First WebApp

Let’s create our first Web application in python using pyWebIO library.

I am creating a simple calculator that will accept two numbers as inputs and based on the selected operation (i.e., addition, subtraction, multiplication or division), it will display the output.

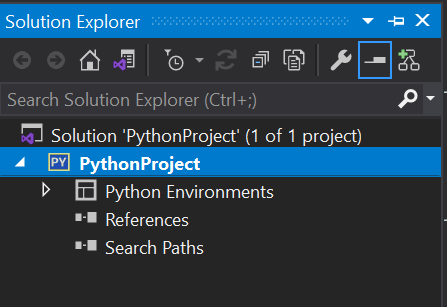
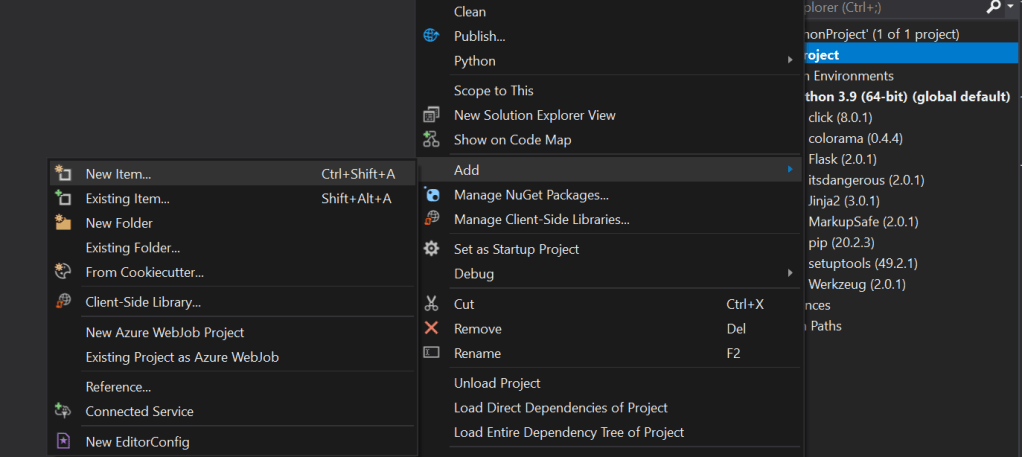
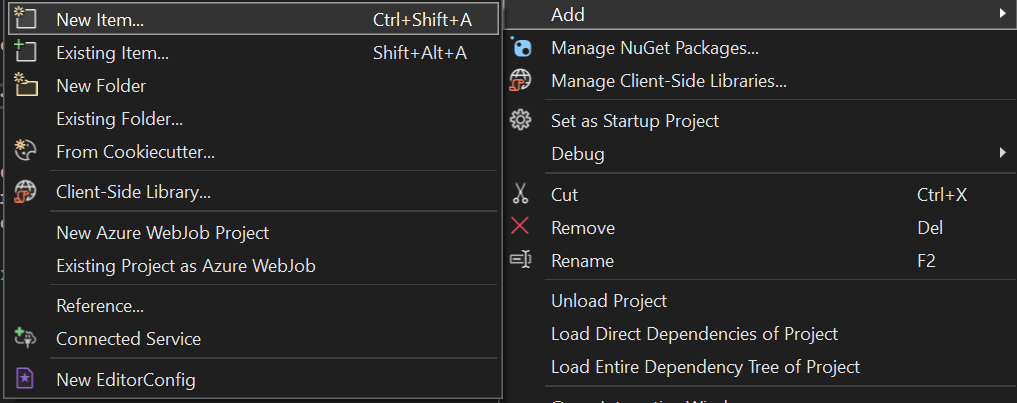
Let’s create a new file, to our existing project. Right click on the project -> select Add -> New Item

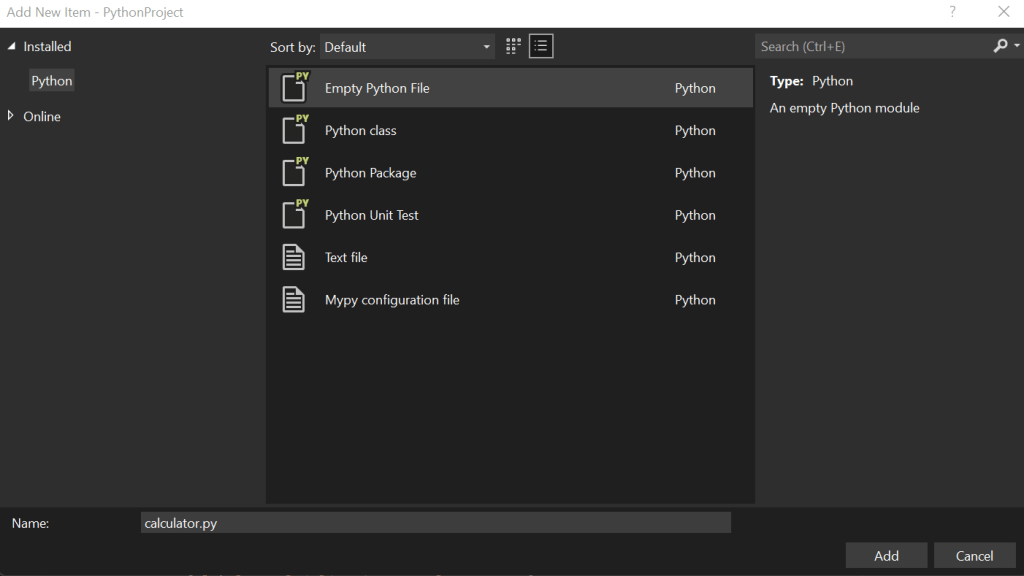
Specify the name of the file as calculator.py

Let’s define a function, called displayCalculator and I will be adding code to display the controls that are required to capture.

def displayCalculator():
    data = input_group("Calculator",[
    input("Enter the first Number", name='firstNum', type=NUMBER),
    input("Enter the second Number", name='secondNum', type=NUMBER)])
        
    action_val = actions(label="Select Operation", 
       buttons=[{'label': 'Addition', 'value': 'ADD'}, 
                {'label':'Subtraction', 'value': 'SUB'},
                {'label':'Multiplication', 'value': 'MUL'},
                {'label':'Division', 'value': 'DIV'}])

I have defined a function called displayCalculator().

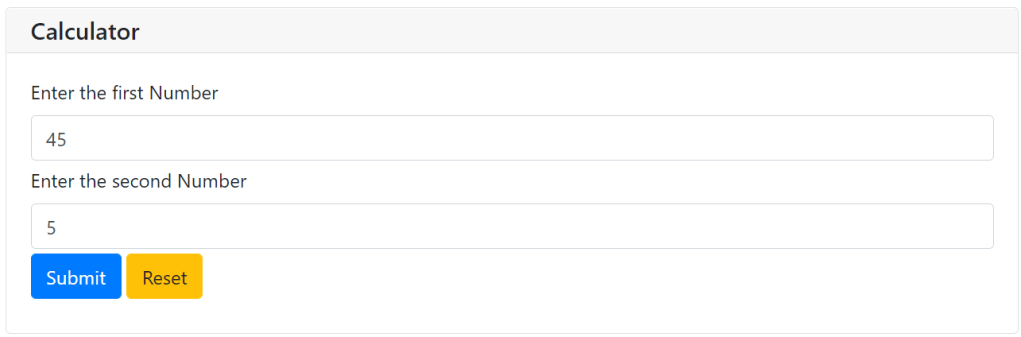
The first line of the function uses input_group method to display multiple controls at the same time.

This will display two input fields that will accept two numbers as like below.

The set of code creates two buttons, that is required to captured the operation type, i.e., addition, subtraction, multiplication or division.

Now, the screens are ready. We need to perform calculation. Let’s create another function to calculate.

Let’s create a new function named calculate that will accept three parameters i.e., first number, second number and the operation.

Calculate function should be like below.

def calculate(firstNum, secondNum, Operation):
    if Operation == 'ADD':
       put_markdown("<b>Addition</b> of {} and {} is {}".format(firstNum, secondNum, firstNum + secondNum))
    elif Operation == 'SUB':
       put_markdown("<b>Subtraction</b> of {} and {} is {}".format(firstNum, secondNum, firstNum - secondNum))
    elif Operation == 'MUL':
       put_markdown("<b>Multiplication</b> of {} and {} is {}".format(firstNum, secondNum, firstNum * secondNum))
    elif Operation == 'DIV':
       put_markdown("<b>Division</b> of {} and {} is {}".format(firstNum, secondNum, firstNum / secondNum))

I have used if condition to check what is the operation that is selected by user, and perform the required operation accordingly.

put_markdown will display the text in html format. If you see the code, I want to highlight the selected operation, hence, used <b></b> bold tag around the operation.

Empty braces ({}) will be replaced with the values mentioned using format method in the order it is mentioned.

Now, we have defined two functions, one to display the form and another one to calculate.

We need to call the calculate() function from displayCalculator() function and ensure that we are passing values for proper calculation.

Write this code inside displayClaculator() function.

calculate(data['firstNum'],data['secondNum'],action_val)

So, the entire code should look like below,

from pywebio.input import *
from pywebio.io_ctrl import *
from pywebio.output import *

def calculate(firstNum, secondNum, Operation):
    if Operation == 'ADD':
       put_markdown("<b>Addition</b> of {} and {} is {}".format(firstNum, secondNum, firstNum + secondNum))
    elif Operation == 'SUB':
       put_markdown("<b>Subtraction</b> of {} and {} is {}".format(firstNum, secondNum, firstNum - secondNum))
    elif Operation == 'MUL':
       put_markdown("<b>Multiplication</b> of {} and {} is {}".format(firstNum, secondNum, firstNum * secondNum))
    elif Operation == 'DIV':
       put_markdown("<b>Division</b> of {} and {} is {}".format(firstNum, secondNum, firstNum / secondNum))

def displayCalculator():
    data = input_group("Calculator",[
    input("Enter the first Number", name='firstNum', type=NUMBER),
    input("Enter the second Number", name='secondNum', type=NUMBER)])
        
    action_val = actions(label="Select Operation", 
                  buttons=[{'label': 'Addition', 'value': 'ADD'}, 
                       {'label':'Subtraction', 'value': 'SUB'},
                       {'label':'Multiplication', 'value': 'MUL'},
                       {'label':'Division', 'value': 'DIV'}])

    calculate(data['firstNum'],data['secondNum'],action_val)

if __name__ == '__main__':
    displayCalculator()


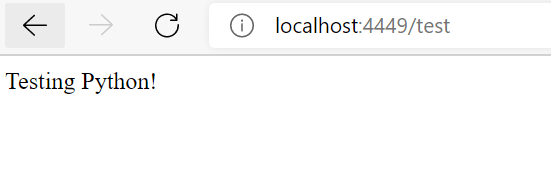
After executing the code, you should see the output like below.

Enter two numbers that you want to calculate and click Submit.

Click on the operation that you need to perform.

I clicked Addition. Hence, below output.

Please try different operations and comment in case if you face any issue.

WebApps in Python

PyWebIO – Helps to build webapps in Python. The main advantage is that no javascript nor the front end code is required.

Refer to this site for more information on PyWebIO – https://www.pyweb.io/index.html

Let’s see how to create our first web application using PyWebIO.

Create First Project in Visual Studio

Open Visual studio and create a new Project. Search for Python in the templates.

Select Python web project and click on “Next“. Then, click “Create

This creates a new Python project and can be viewed under “Solution Explorer“.

Let’s install a python library called Flask. Expand Python Environments, you should be able to see the version of the Python that is installed.

Right click on the python version and click on Manage Python Packages.

Search for “Flask” and click on “Run command PIP install Flask“.

Once, it is installed, it will show up under the solution explorer -> Under Python environments.

Now, let’s add a new Python code file.

Right click on the Project name, in our case “PythonProject” under Solution explorer. Select Add -> New Item.

Select Empty Python File, change the name of the file to app.py. Click Add.

Once done, open the app.py file and add the code as below.

This code creates an app that has two different methods called hello() and test().

There is a route that is defined on top of each methods.

The last if block says that the app should run in the localhost with port number as 4449.

Let’s run this code. Hit the debug button. It should open the web browser with this url – https://localhost:4449.

You should see the output like below:

This is because there is one route defined for the app in the code.

This means that whenever there is just the url or it is routed with /hello, it should return “Hello Python“.

Now, let’s change the url to https://localhost:4449/hello. It will render the same output.

There is another route defined for the app in the code,

If we change the url now to https://localhost:4449/test, it should return “Testing Python!

Likewise, we can create applications to render differently on different routes.

Let’s see some more advanced applications in the next post!

Reduce

Reduce is a functionality that is introduced in Python that will take 2 elements at a time from either list or tuple and the result of that operation is again taken with next element in the list till we arrive at a solid answer and the list or tuple traversing is complete.

Let’s understand this better with an example:

Line 2: We have imported reduce function from functools module.

Line 4: A list named reduce_me is created with 5 elements in it.

Line 5: Reduce function is called for first and the second element, the operation mentioned is multiplication (first*second) and the list i.e., reduce_me is passed to reduce function.

Line 6: The result of reduce operation is printed.

Output:

Let’s run the above code and see the output.

Let’s see how the result is arrived.

We have a list named reduce_me with elements 1,2,3,4,1. This list is passed to lambda reduce function which will perform multiplication of first and second number in the list.

First number in our list is 1 and second number is 2.

Multiplication of two numbers (1 and 2) is 2. Now, we have to use 2 (the result of multiplication of two numbers) and multiply with the next number i.e., 3. Now the result of multiplying 2 and 3 is 6.

Now, we have to use 6 and multiply with the next number i.e., 4. Now the result of multiplying 6 and 4 is 24. Now, we have to use 24 and multiply with the next number i.e., 1. Now the result of multiplying 24 and 1 is 24.

As all the values in the lists are traversed, reduce operation will stop here and the result is 24.

Reduce is very helpful for many business requirements.

Pickles

Pickles is one of the most important feature of Python. Pickle in Python is a representation of an object as a string of bytes.

These bytes can be saved in a database, different file path or altogether into a different computer.

Later, these bytes can be reassembled to form the original Python object which is called as Unpickling.

Major purpose of pickling is to store temporary results that can be used as an input for another Python program, creating backups, etc.

Python contains Pickle module that contains dump function to pickle an object to file and load function to unpickle a file and restoring it to the Python object.

Let’s understand more about Pickles using example.

Let’s create a file called “Pickling.py” and create an object. Here, I am creating a tuple that contains a String, Number and a floating number.

Let’s create a file named “pickle_file” to write the object into it.

It’s important to use binary mode while pickling the object into file. we have mentioned binary mode using “ab” in the open method.

We need to use dump function to write the object “object_for_pickling” into the file “test.pickle“. To do so, first step is to import pickle module.

Upon executing this file, it will create test.pickle file in the current folder with the object data being added into the file in binary format.

If you open the created file, you should see some text similar to this.

Now, that the data is dumped to the test.pickle file, let’s read the object from the test.pickle file using load function.

Let’s remove the data from object_for_pickling variable before loading data into it.

Let’s read the data from test.pickle and load the data into object_for_pickling variable.

After loading, we can check if the data is loaded properly by printing object_for_pickling variable.

We have learnt about Pickling. Let’s learn few more interesting feature of Python in next post.

Globbing

At times, whenever we are searching for files in our System or Laptop, we have used wild card patterns like *, ?, etc.

For example, if I want to search files that starts with Hepsi, I will use pattern like Hepsi* which will list down all the files that start with Hepsi.

Python provides a function glob in the module also named glob that implements globbing of directory contents.

The glob.glob function takes a pattern and returns a list of matching filenames / paths.

For example:

In the first line, glob module has been imported.

In the second line, glob function is call with value as “C:\\P*” which means that all the folders or files present under C drive should be listed.

We have used print function to display the values from the glob function.

Let’s execute this and check the output.

Output:

glob function has listed down all the files / folders starting with P.

Below table lists down all the wild cards that can be used in glob function.

Wild Card PatternDescriptionExample
*Lists down all the data that matches with the either 0 or more characters..P* – lists down all the files that starts with P extension.
?Lists down all the data that matches with one character.?.txt – lists down all the text files whose file name is just one character like 1.txt, a.txt, etc.
[…]Lists down all the data that matches with at least one character listed in the bracket [aeiou].txt – lists down all the text files whose name has vowels in them.
[!…]Lists down all the data that doesn’t matches with the character listed in the bracket[!aeiou].txt – lists down all the text files whose name doesn’t have vowels in them.

Exceptions

While we are trying to access files via python, if there are any issue, it will raise an IOError.

There are many scenarios where we can get IOError.

❑ If we attempt to open for reading a file that does not exist, it will throw an IOError.
❑ If we attempt to create a file in a directory that does not exist, it will throw an IOError.
❑ If we attempt to open a file for which we do not have read access, it will throw an IOError.
❑ If we attempt to create a file in a directory for which we do not have write access, it will throw an IOError.
❑ If our computer encounters a disk error (or network error, if we are accessing a file on a network disk), , it will throw an IOError.

Whenever there is any error, our program should handle it gracefully.

This can be done using try block.

In the below code, we are trying to open the file to read inside the try block.

In case if there is any issue, the code inside the except block will execute.

OS Module

The major use of OS module is that whenever we need to get more information about files or directories from our file system, we can use the OS module.

We need to import it first in our program as shown below to use it.

import OS

Using OS module, we can perform lot of activities like retrieving the file name, listing the files in the directory, finding out if the current path is file or folder, converting relative path to absolute path and vice versa.

All these activities can be performed irrespective of different OS version like windows, linux, etc.

For example: In windows, file paths are separated by backslash. However, in other OS like MAC, it is forward slash.

We don’t need to handle it in our code for different OS, it is automatically taken care by OS module.

Files and Directories again

Let’s continue writing to file that was created in the previous post.

In the code snippet above,

Line number 1: The file path is mentioned in the __file__ variable.

Line number 3: This code represents how to open the file and write the file.

Line number 5: Writing file with few more data.

Line number 7: Writing data to the file using print statement.

Line number 9: del – this command is used to delete the reference of the file from python program.

Please note that the del command doesn’t delete the actual file, but it just removes the reference or the connection to the file from Python program.

Files and Directories

Python provides functions to write / read files and operations like reading contents from the directory. These functions play a trivial role as most of the programs involves reading files or directories.

Let’s discuss few functions related to this.

File Object – First step to read / write files in Python is using File object.

Let’s start by creating a test file via Python.

To create a file, we need to use File object and say Python that we want to create a file.

Assume that you need to create a file in the C drive as mentioned below. We need to create Test.txt file.

C:\Python\Test.txt

We need to use the command as shown below.

Line no 1 has a variable __file__ which stores the path.

Line no 3 has a variable sampleFile which is assigned to open function that takes __file__ as parameter and “w” – which means that the command wants to write the file.

In case if the file is not found, by passing “w” to open function by default it will create the file.

Execute the above code and you will see that the file is getting created automatically.

In case if “w” is replaced with “r“, it will throw an error as it is trying to read the file which does not exist.

Also, if we aren’t giving any value i.e., neither “w” nor “r“, by default it will assume read operation and will throw error.

Let’s write some contents in the file that is created earlier.

Now, go to the file path and open the document to see if the contents are written.

The contents are written to the text.txt file that we created.

Let’s continue to explore more on Files and Directories in further posts.

Modules

Modules are the logical unit that comprises of functions that can be reused in other multiple files.

Consider module as the dll or the external files which can be referred in the file.

Let’s see how to create a module. Create a new file called “modules.py”

Add a function as shown below,

This function just echoes the data whatever is passed on.

Let’s import this module in the existing file that we created earlier. I am importing “modules” file in StringFormatting.py file that I created earlier.

We need to use “import” statement to refer the modules.

In the line number 1, we have imported modules.

In line number 7, we have called echo method which takes “test” as an input.

Please ignore line number 3 and 4, as these code lines are part of previous example.

Let’s execute this program and we should see that the echo function gets executed and echoes the data whatever we have passed.

Output:

I believe, this would have given you an fair idea about modules. There are many advantages of using modules in python like code modularity, maintainability, etc.

There are several modules provided by Python itself which provides set of core features like to use the features of OS, there is a module called os which needs to be imported.

sys module contains services that Python offers that mostly involve system-specific items.

Likewise, we can use different set of features by importing the corresponding modules.

Design a site like this with WordPress.com
Get started